Rip Them Off!
Take the edge off in removing that wallpaper that has been taunting you to rip it off your walls. There is no reason to fret that seemingly daunting task of clearing your wall and either replacing it with something more to your taste. House painters from SPPI know that all you need are the right tools, the proper knowledge and a bucketful of patience.
A critical concern when laying the groundwork is figuring out the best way to go about it. Your options include dry-stripping, steaming or spraying with chemicals. It is therefore important to know what kind of wallpaper was used, how it was put on and what kind of wall it was plastered on. So, first things first then.
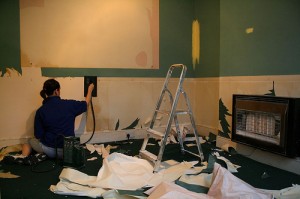
Determine the kind of wall you have. Tapping on different areas will give you a good idea what it is made of. A hollow sound means it a drywall. A wet method may not work well for this type so you need to apply utmost care should you need to resort to using liquid or steam to do the task.
Find out what type of wallpaper was used. Is it strippable, peelable or the tradition type? With your putty knife, loosen a corner of the wallpaper and peel. Jump for joy if it comes off in a single pull for you have the strippable type. If it does but not in one piece, then don’t despair. At least you still have a peelable type. You, however, have every right to groan if you end up with the traditional kind.
Scoring that wall. With a use of a utility knife, lightly make some cuts on the wallpaper. Better yet, get yourself one of those wallpaper-piercing tools from the hardware store. These handy helpers are armed with spiked wheels that create tiny holes on the wallpaper to allow moisture to seep through the surface and the glue beneath it.
Get going with the rip-off. Armed with the knowledge of what you are dealing with, you can now proceed with applying the liquid solution on your wallpaper and leave it for approximately 30 minutes. Whether it’s home-made (warm water plus vinegar solution) or a non-toxic chemical you obtained from a hardware store, it is your choice. After letting the wallpaper soak, you can start pulling and peeling. You can apply more of that wallpaper solution and use a scraper on certain areas that may prove a little more challenging. Work on one section at a time, making sure you get all that paper off the wall.
Wrapping up the job. Almost over but not yet quite. You still need to remove any glue residues with a mixture of tri sodium phosphate (TSP) and warm water. Then rinse off the TSP with clear water. If your battle with wallpaper created any holes, you need to repair these first using drywall or a spackling compound. Allow them to dry overnight then you can sand these, apply primer and, yes, your wall is now ready to be painted.
Getting that wallpaper off is not a walk in the park but it is not as daunting as it seems. Patience is always the key. Lots of it. However, if you badly need a helping hand, check us out at www.soperfectpaint.com and let’s figure out how we can deal with your wallpaper woes. We are based in Grayson, Georgia, and has done significant work in the Snellville and Alpharetta, Georgia areas.
Click below for free estimate on your next wallpaper project:


